I LOVEEEEE this dress!!
This is for a size 4T dress, but if I would've made the sleeves a tad longer, it would fit my 7 year old as a shirt. But it is a 3/4 length sleeve in her, but she doesn't feel comfortable wearing it without longer sleeves. Tomboy I tell ya!!
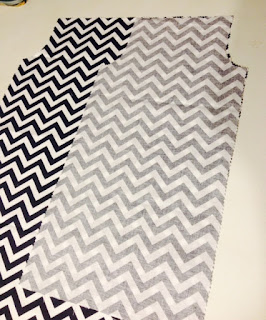
So I started out with a previous fabric I've used. Navy blue chevron purchased locally.
I cut out, using pinking shears, 2 rectangles 18" wide and 23" long for a front body piece and a back body piece.
During that process, my little lovey wanted her picture taken with her chocolate. This girl has my whole heart, forever and ever!!!
Put both body pieces, right sides or wrong sides together. Since we are just cutting the sleeve holes out.
I use my sleeve pattern from previous posts to cut the holes out.
Put those two body pieces aside and you can use either a different fabric, or the same, for the sleeves. I've seen many different dresses, with corresponding fabric, but for this one I chose to use the same.
So I start with cutting 2 rectangles 10.5" wide by 20.5" long.
I left the length with raw edges, as it will be hemmed later on.
Put right sides together, with the raw edges at the bottom, use the same sleeve pattern, from the body of the dress, to cut two more sleeve holes FROM THE SLEEVE FABRIC.
You will then end up with two sleeves, and two body pieces, with the same sleeve holes cut.
Now, lets grab ONE sleeve and connect it to ONE body piece. With right sides together.
I sewed this using a straight stitch and backstitching on both ends.
Repeat for the other sleeve, with right sides together.
Looks kinda funky, but it will be totally kick ass after we are done!
Repeat for the backside. Its a little weird, but its easily done.
Sew using the same straight stitch and backstitching on both ends for each sleeve.
Now lets starting pinning!! And no, I don't mean quit reading and head to Pinterest, even though I'm a completely obsessed Pinner!
We are pinning from sleeve opening to bottom of dress.
Sew, sew and sew!! I used a straight stitch, and backstitched each end.
Repeat with the other side.
Now to create a casing for our elastic. I left about a 1.5" inch opening on the "back" of the dress. Marked by pins for easier sewing for me.
I folded down about half an inch, pressed, and then folded down once more. I pressed once more. Since this is going around the whole neck piece, even going over the sleeve seams, I pinned my casing down for easier sewing. I didn't want wonky edges. If you are comfortable, with your pressing, go for it!
I sewed around with a straight stitch and backstitching each end. Make sure not to go over your casing opening of course.
I used 3/4" elastic. I measured the neck piece (from one shoulder to the other) and took off about two inches. Cut your elastic to the size needed, and get your trusty safety pin.
Fish the elastic through the casing and pull towards the other end of the casing.
When you get the end of the elastic (without the safety pin) at the opening of the casing, secure it to the dress with another safety pin, so it does not end up getting lost in the dress.
Finish fishing it through the dress, making it scrunch, until you get through the other side.
Take both ends of the elastic, and secure only the ends of the elastic together. I straight stitch and backstitch over my elastic pieces about 4-5 times. Some zig zag, but do whatever floats your boat.
Push the elastic into the casing, and sew up your casing. Make sure NOT to go over the elastic. Just sew up the 1.5" opening on the same line. I know that's pretty DUH, but I gotta add it!
Turn your dress right side out... hem the bottom to your preferred length, as well as both sleeves. I just folded up .5" pressed, and then another .5" for both.
Now, flip your dress right side out, add a bow, and TA-DA!!!!!
BEAUUUUUUTIFUL!!!!
Thanks for reading and HAPPY STITCHIN'!!!!


No comments:
Post a Comment